
Email/Text Students in a Course Section
Creating a student report in Navigate allows you to quickly identify and communicate with students enrolled in a specific course. By using course-based filters, you can pull an accurate list of students, review key information, and send targeted messages that support their success. This tool helps streamline outreach, ensure timely communication, and keep both faculty and staff connected with the students who need guidance or reminders throughout the term.
Getting Started:
Login to Navigate using your WCU credentials
Step 1: Click on the Reports Icon
On the left side of the screen you will see a collection of icons.
Click on the icon that looks like a spreadsheet
Step 2: Course data
A Report page will appear. You will need to choose the filters to create the report.
In the first Field type in the word "Course" and scroll down to Courses (Course Number)
In Term: this filter will auto default to current term.
Condition: defaults to is
Value: type in course name – EX SOC, and you will see all SOC classes in the dropdown offered that term.
Step 3: Add Filter
To include course section numbers, click on Add Sub-Filter
In the first field: Scroll down and choose Section Name
Condition: Contain any
Value: select Section number
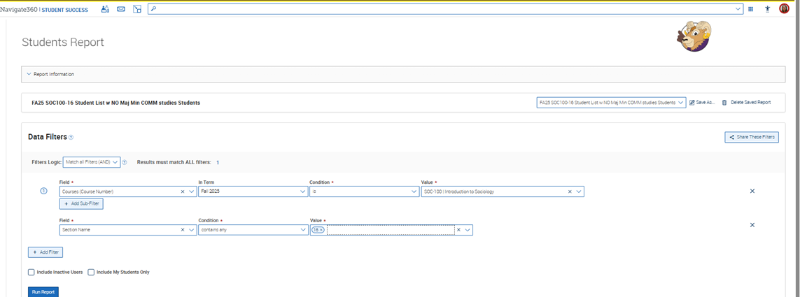
Step 4: Run Report
Once you have selected your course and course number – click on Run Report
ADDING MORE FILTERS TO REPORTS
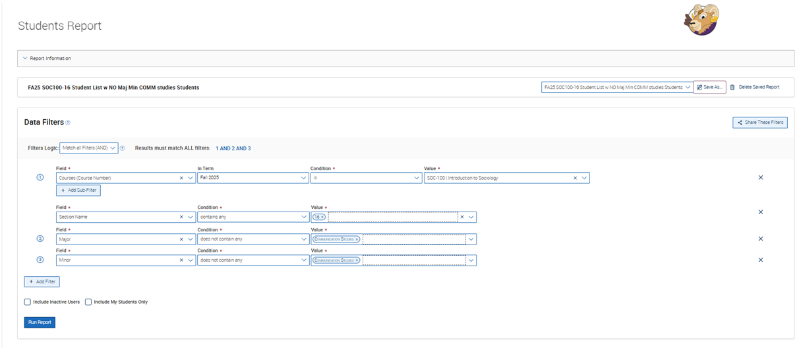
For a more detailed report, you can ask Navigate to not include students with certain majors or minors.
For instance: You would like a list of students taking Soc 100, section 16 who are not Majoring or Minoring in your you major. To accomplish this you will need to add two new filters, this will help you achieve a more targeted list of students.
Step 5 Adding Additional Filters
Add Filter
Field: Major
Condition: scroll to does not contain any
Value: choose Major
You can also perform this search to not include minors.
Add Filter
Filed: Minor
Contain: Does not contain any
Value: choose Minor
Step 6: Save Report
You can save any report created in Navigate. When you save a report it will be stored in your MySaved Reports tab in the Reporting section of Navigate. This allows you to retrieve the information at another date. You will find the Save button at the upper right section of the report page.
Remember to include the term and the filter names used in the report in your naming process.

Step 7: Selecting your students to send an email or text message
To select all students, click on the box next to "Student Name" in the toolbar. This will check off the first page of student names. Each page contains up to 100 students
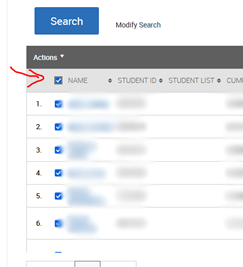
Note: To select students, you will need to click on the "Name" box on the toolbar. Check marks will appear on all student names, selecting them for your correspondence.
If your student list contains over 100 names, click on the check mark at the bottom of the list to capture ALL the names for your message.

Step 8: Decide on the action you want to take
Click on "actions" and select Send a Message to a Student.

Step 6: Send Your Message
You can then either send an email or a text:
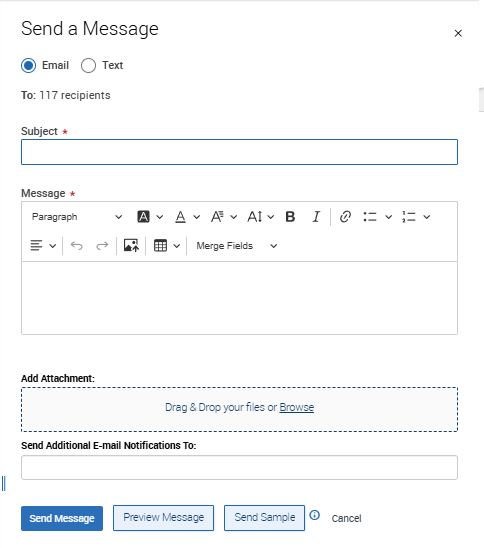
Email:
- You do not have a character limit in the body of the message.
- Make sure to give the email an engaging subject title to encourage students to open the email.
- You can add attachments
- You can cc others
- You can preview message.
Text:
- The message will be sent to the mobile number the student gave WCU.
- Remember text is limited to 300 characters including spaces and punctuation.
- Always follow FERPA guidelines when texting a student.
- Best practice: Do not send messages late in the evening or on weekends.
- The message can include URL links, but no attachments
- The sender is identified by a random phone number starting with area code 610. It does not identify WCU in the call ID.
- *You should identify yourself and the reason you are messaging the student in your first sentence (include contact information).
- The first 100 students on the list can reply to text messages – their reply will be sent to your WCU Outlook email inbox